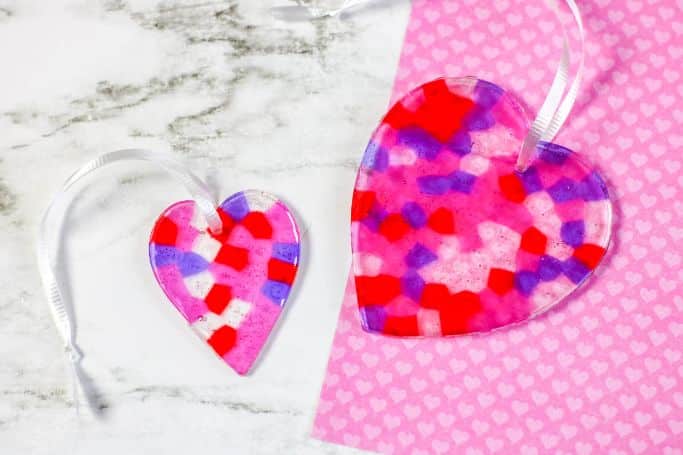
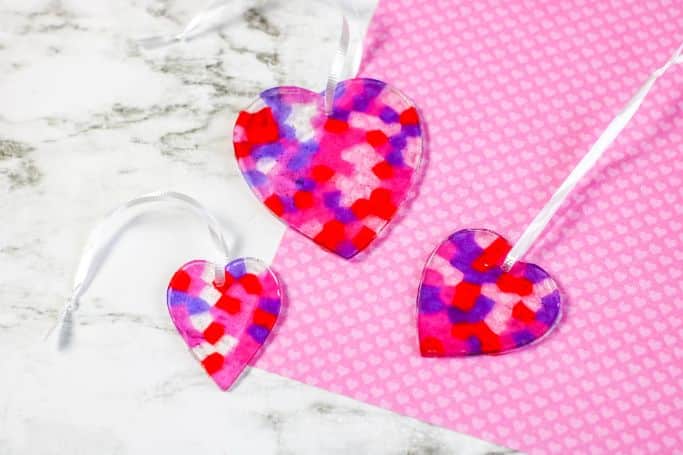
Looking for a fun and easy way to show your love for your kids this Valentine’s Day? Why not make some heart Valentine suncatchers with melted beads? Crafting is a wonderful way to spend quality time together.
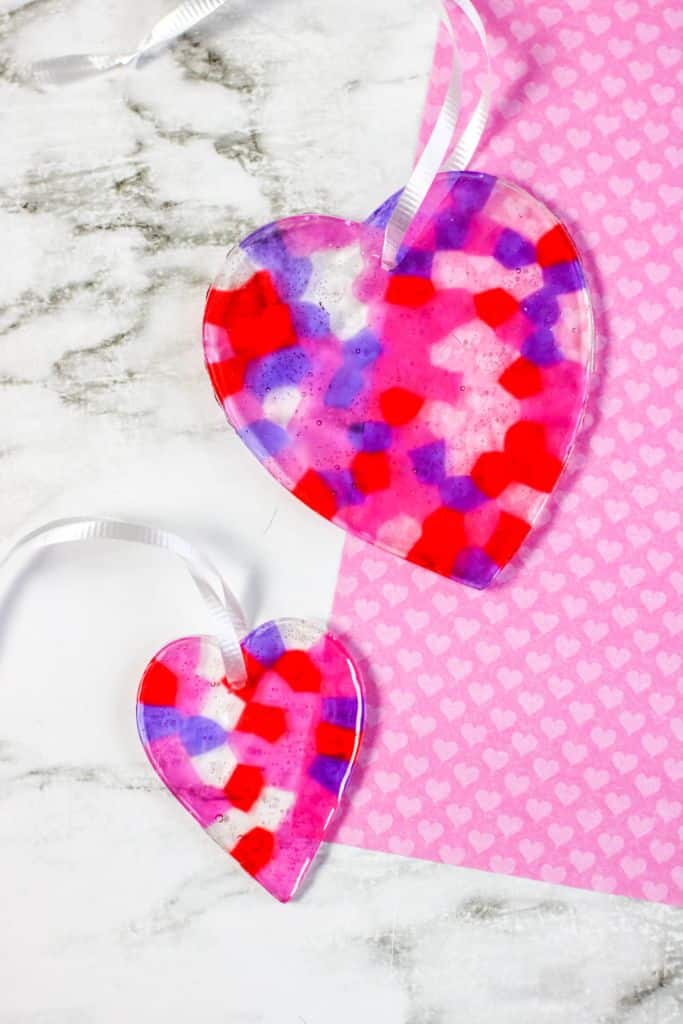
Kids will love watching the beads melt and form into beautiful hearts, and you’ll love the adorable finished product. They’ll look amazing hanging in your window or as ornaments on a Valentine’s Day tree. Plus, it’s a great way to use up any leftover beads from other projects.
Ready to get started? Keep reading for instructions on how to make these beautiful heart suncatchers.
You’ll also love this heart butterfly craft for Valentine’s Day!
Why You Should Make These Valentine’s Day Suncatchers
- This is an easy and inexpensive craft that you can make together.
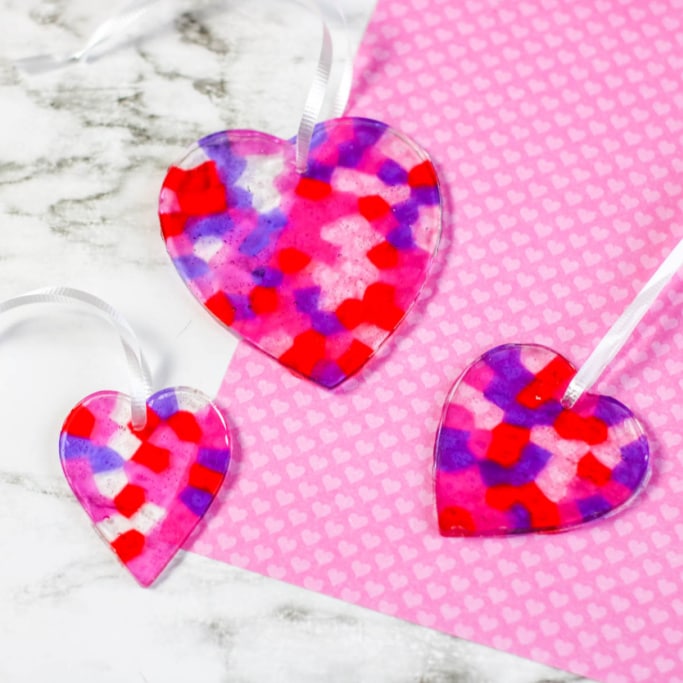
- It’s perfect for tweens and teens, but everyone in your family will have fun making their own heart-shaped suncatcher!
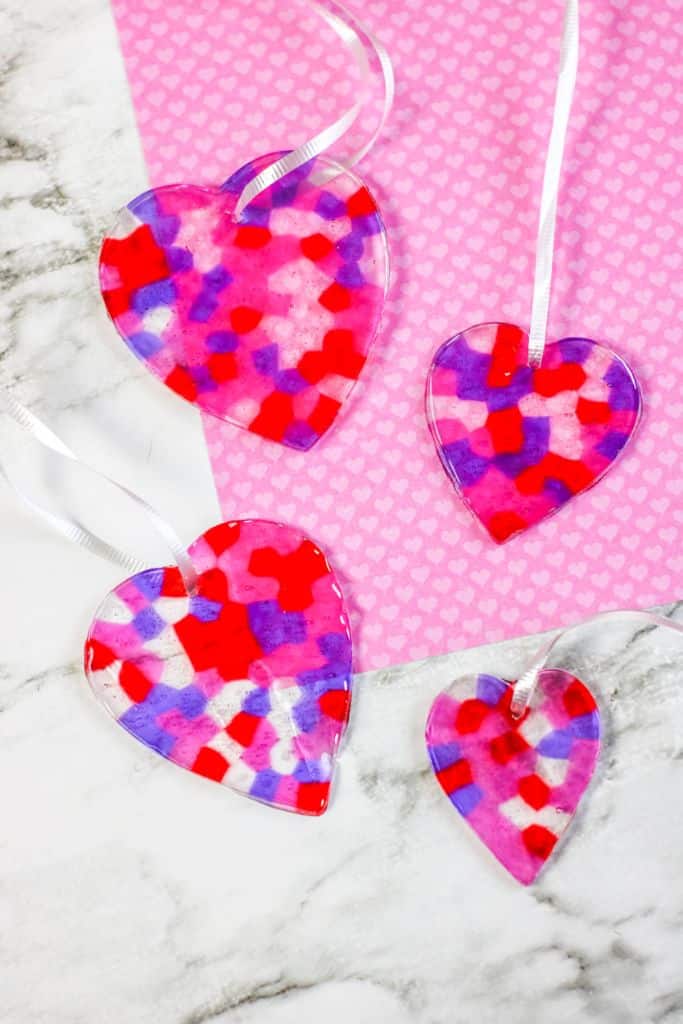
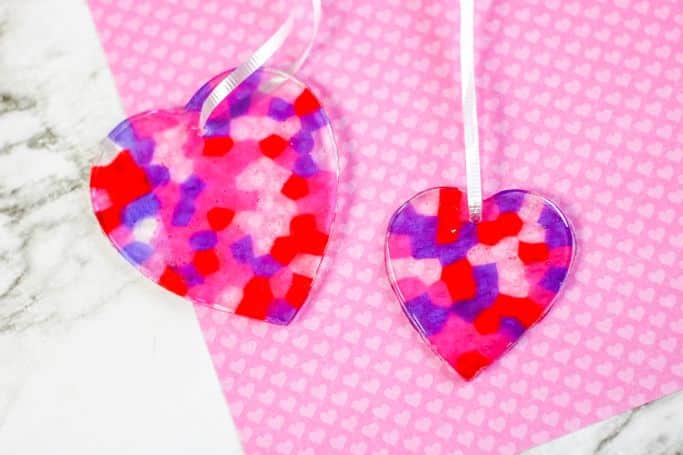
- You won’t believe how beautiful these look when they are finished. You’ll love seeing them on display every day.
- Your kids will be excited about spending time together making something special while having lots of fun along the way too!
IMPORTANT NOTE: This craft requires a lot of adult assistance and strict adult supervision. Adults should put the beads in the toaster oven and take them out. Grown-ups should also run the drill to make the hole in the suncatchers. Kids can help with arranging the beads and tying ribbons to the suncatchers.
Materials for Valentine Suncatchers
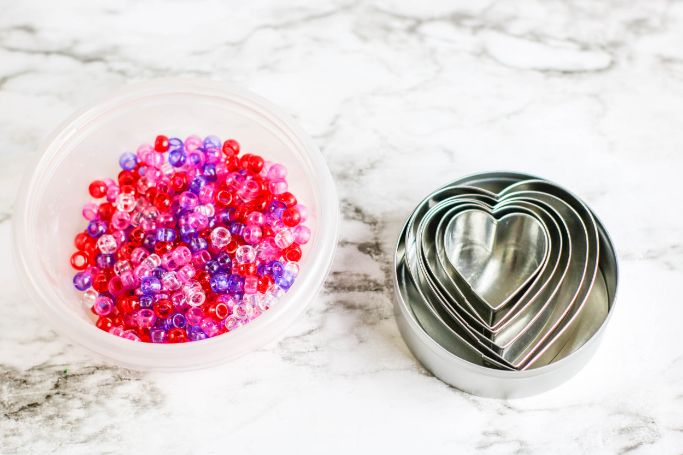
Here’s what you’ll need to make these heart suncatchers for Valentine’s Day:
- Plastic pony beads
- Heart-shaped metal cookie cutters
- Baking pan
- Aluminum foil
- Drill fitted with ⅛ inch drill bit
- Toaster oven
- Ribbon for hanging the ornaments
How to Make Heart Suncatchers with Melted Beads
DISCLAIMER: Please be aware that the beads do release plastic smells/fumes as they melt. To avoid the smell, you can use a toaster oven outside. Do not attempt this craft without plenty of ventilation in an outdoors environment.
Step-by-Step Photos
Instructions
- Preheat toaster oven to 400 degrees.
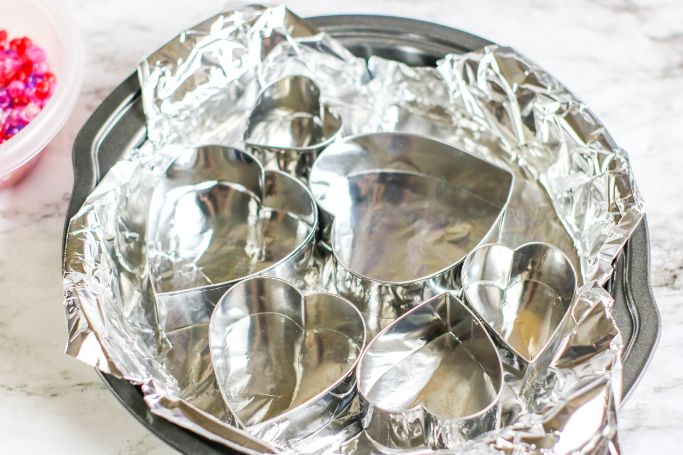
- Line baking pan with aluminum foil to protect the pan and make it easier for the ornaments to release from the pan.
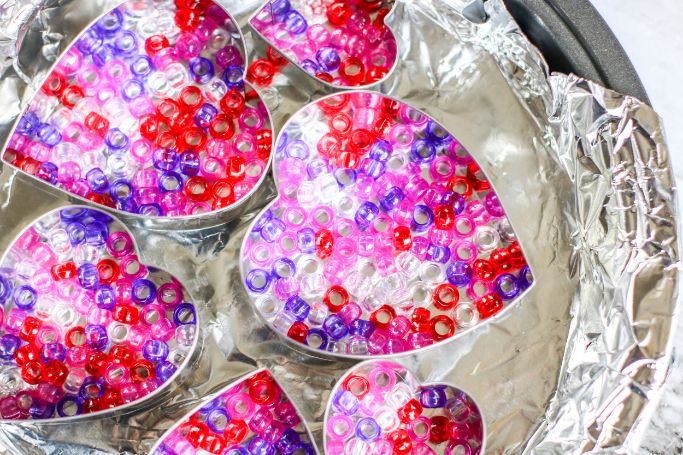
- Place cookie cutters on aluminum foil in baking pan. Fill each ornament with a single layer of beads. Use a toothpick or bamboo skewer to arrange the beads.
- Carefully put the baking sheet in the oven and melt the beads. The time can vary based on the type of bead. Begin checking at 5 minutes. (These took 15 minutes to melt.) The suncatchers are ready when the beads are melted and the hole in each bead has disappeared.
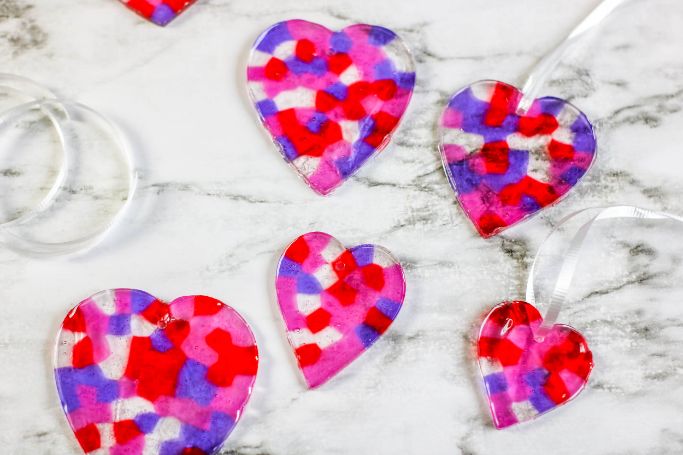
- Remove from toaster oven and allow to cool completely prior to removing from the cookie cutters. To remove the heart suncatchers, gently pull the sides of the cookie cutter away from the ornament.
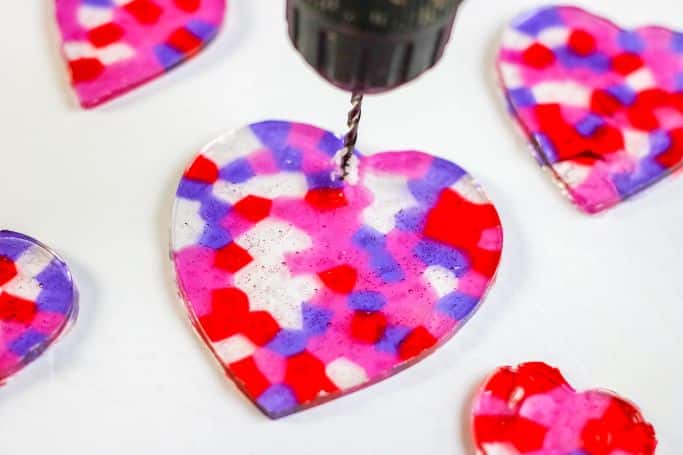
- Use the drill to create a small hole in each heart ornament for hanging.
Books to Go With This Suncatcher Valentine’s Day Craft
Are you making this heart suncatcher craft with little ones? Here are some cute Valentine’s Day books for kids that we recommend:
- Pete the Cat: Valentine’s Day is Cool
- The Invisible String
- The Night Before Valentine’s Day
- Happy Valentine’s Day, Little Critter
- A Crankenstein Valentine
More Valentine’s Day Crafts for Kids
Love crafts so much that you want to do more? Here are some of our favorite Valentine crafts for kids:
We hope you enjoyed this tutorial for making Valentine suncatchers. If you make them, please tag us on Instagram at gluesticksgumdrops!
Pin this post if you’re not ready to get started just yet to save the idea for later.

Heart Suncatchers for Valentine's Day
This heart suncatcher craft is perfect for kids of all ages and will look gorgeous in any window or on a tree during Valentine's Day!
Materials
- Transluscent plastic pony beads
- Heart-shaped metal cookie cutters
- Baking pan
- Aluminum foil
- Ribbon for hanging the ornaments
Tools
- Drill fitted with ⅛ inch drill bit
- Toaster oven
Instructions
- Preheat toaster oven to 400 degrees.
- Line baking pan with aluminum foil to protect the pan and make it easier for the ornaments to release from the pan.
- Place cookie cutters on aluminum foil in baking pan. Fill each ornament with a single layer of beads. Use a toothpick or bamboo skewer to arrange the beads.
- Carefully put the baking sheet in the toaster oven and melt the beads. The time can vary based on the type of bead. Begin checking at 5 minutes. (These took 15 minutes to melt.) The suncatchers are ready when the beads are melted and the hole in each bead has disappeared.
- Remove from toaster oven and allow to cool completely prior to removing from the cookie cutters. To remove the heart suncatchers, gently pull the sides of the cookie cutter away from the ornament.
- Use the drill to create a small hole in each heart ornament for hanging.
Notes
Please be aware that the beads do release plastic smells/fumes as they melt. To avoid the smell, you can use a toaster oven outside. Do not attempt this craft without plenty of ventilation or in an outdoor environment.
Recommended Products
As an Amazon Associate and member of other affiliate programs, I earn from qualifying purchases.


