Thank you to BeFunky for sponsoring today’s post!
Nearly every year, I make our son’s birthday party invitations. I only mail a few out (to the grandparents, for example), and I send the others digitally via Facebook or email. I also post one to the Facebook event for the party and put one in his digital scrapbook for that year, so I want the invitations to look cute.
And now that he’s going through his superhero phase, making his invitations is a whole lot easier with BeFunky’s photo to cartoon effects. They’re perfect for turning photos of your kid in his/her superhero costumes into fun art for the invitations!
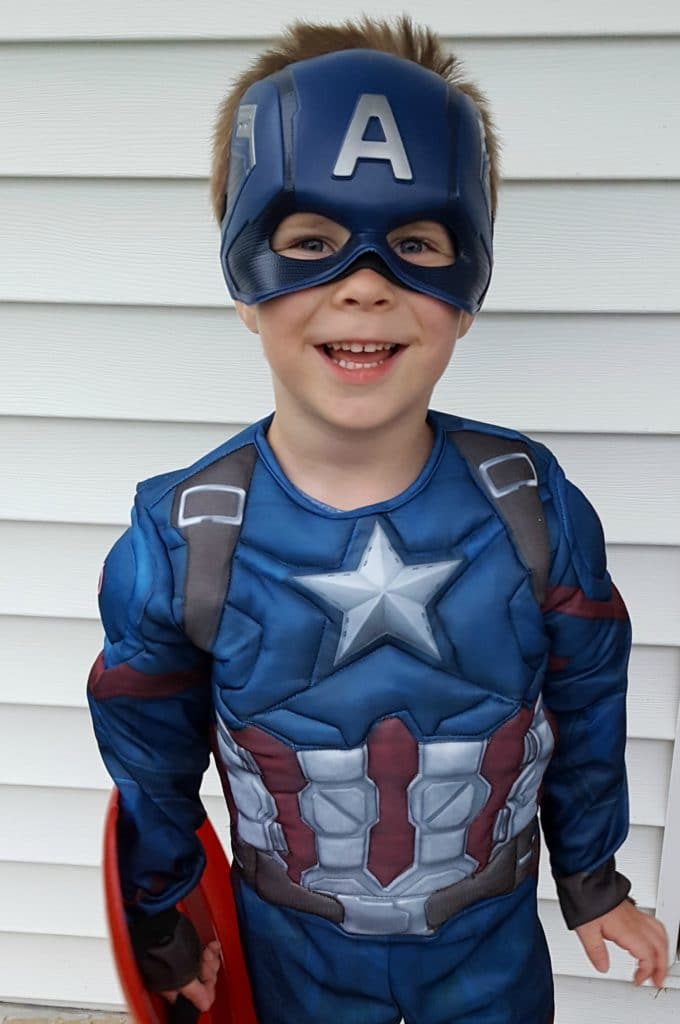
For today, we’re going to use this photo of Ben in his Captain America costume. Just look at that cute smile and crazy hair!
Now let’s upload the photo. Note that you’ll need a BeFunky Plus account ($4.95/month or $2.91/month if you sign up for an annual account) to save the effects to your photos, but you can preview the effects for free. Click on the screenshots below if you need to see larger versions.
Photo to Art Editing
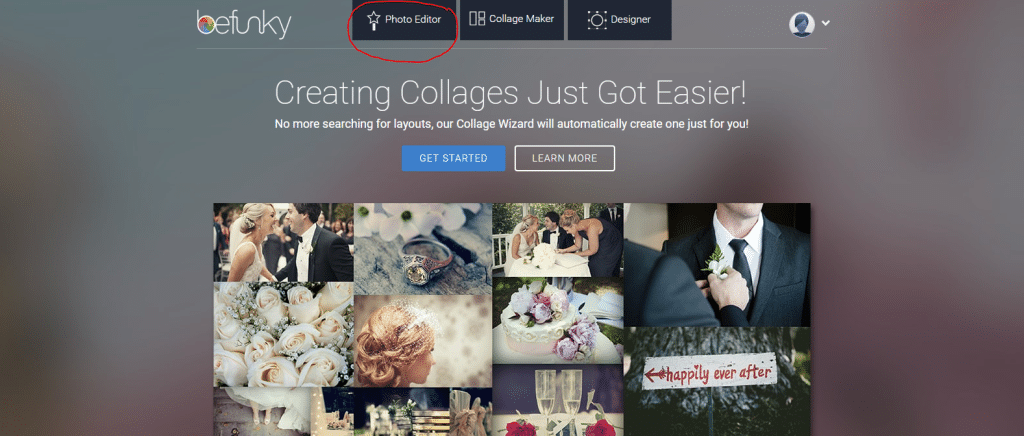
1. Click the “Photo Editor” to upload your photo.
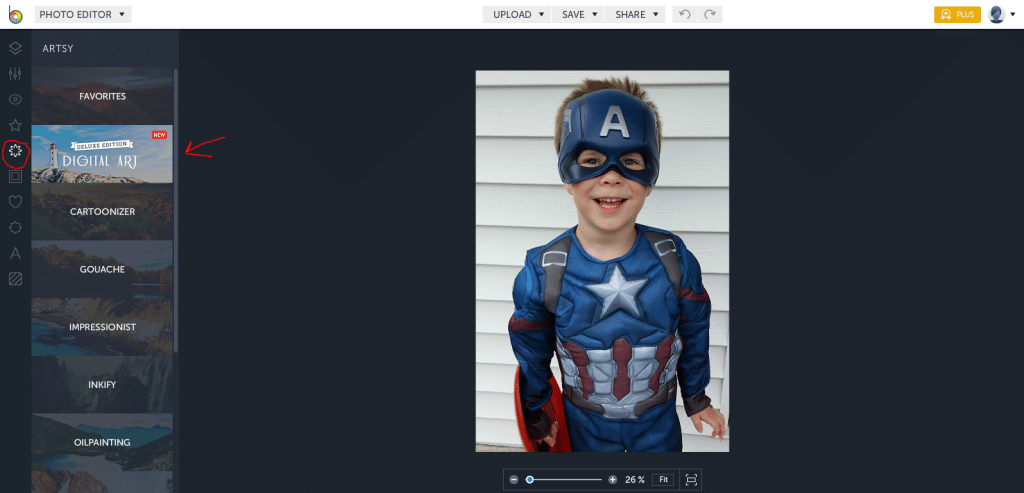
2. Click on the “Artsy” icon (circled in the picture below) and then on the Deluxe Edition Digital Art effects.
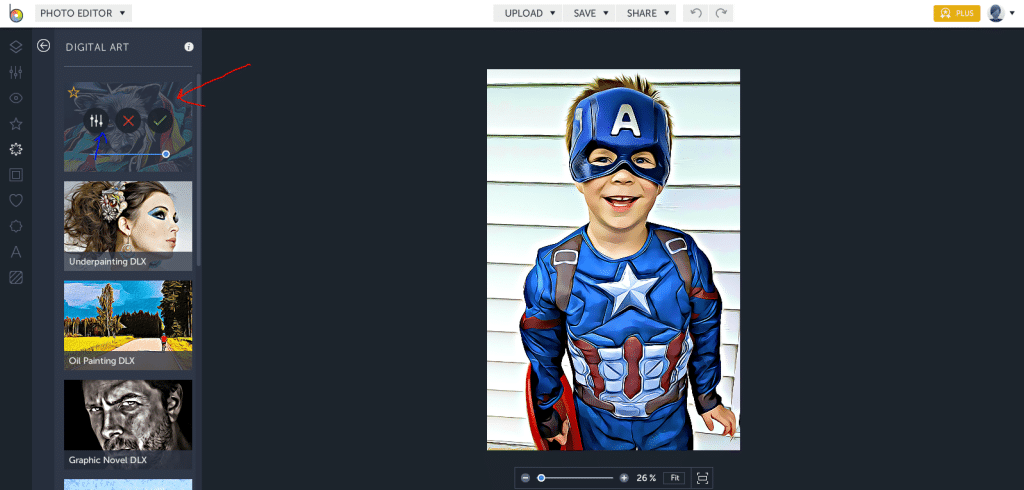
3. Click “Cartoonizer DLX” to turn the photo into a cartoon in one click. To make adjustments, click the slider icon above the blue arrow in the screenshot below. I like it as is, so I’m leaving it there.
4. While I like the cartoon effect, I want to kick it up another notch with the grittier feel from the Graphic Novel DLX effect, so I’m going to layer these two effects. I think this makes it look more like true comic book art!
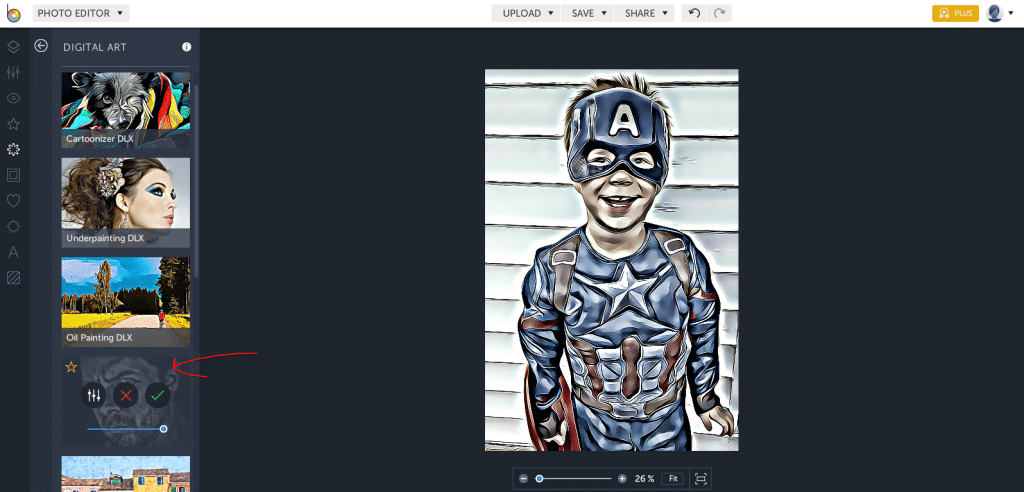
5. So as is, I think it looks a little too gritty now. I’m going to use the sliders to adjust the opacity and sharpness of this effect to around 50 percent.
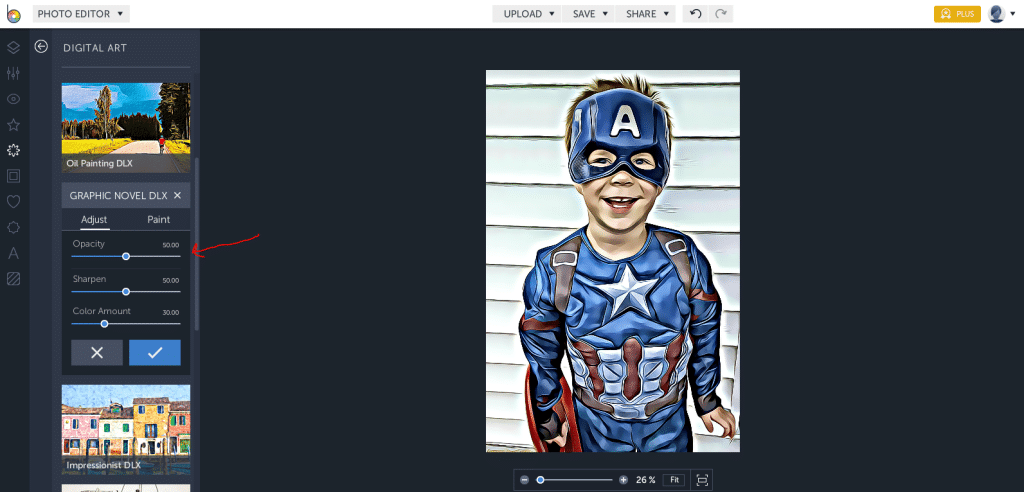
How adorable is that? Save the photo (just click save at the top of the page), because we’ll use it to create diy superhero invitation using the BeFunky templates.
DIY Superhero Party Invitation
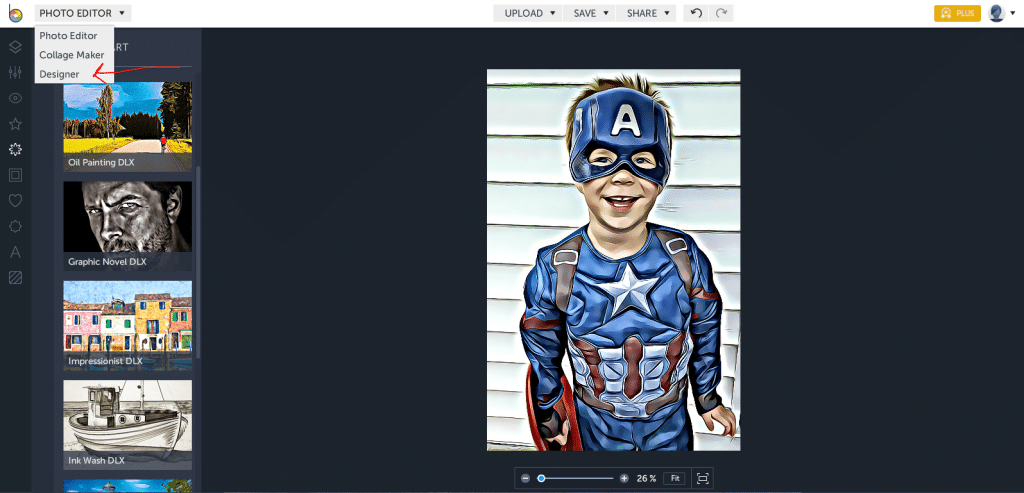
1. After you’ve saved your photo, take it into the Designer by clicking the “Photo Editor” dropdown menu.
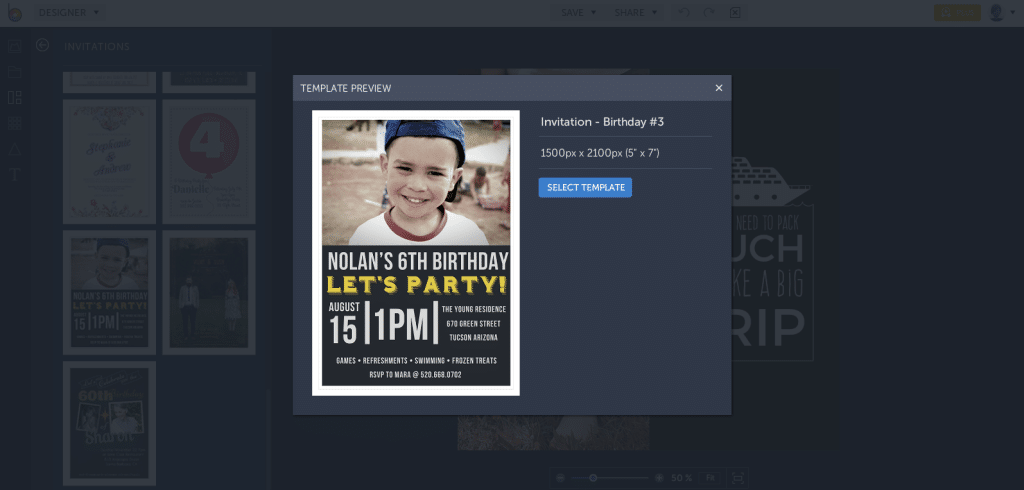
2. Click on “Invitations” and then select the design that says “Nolan’s 6th Birthday Party.” You can select any design you like, but we’re working from that template today. Click “Select Template.”
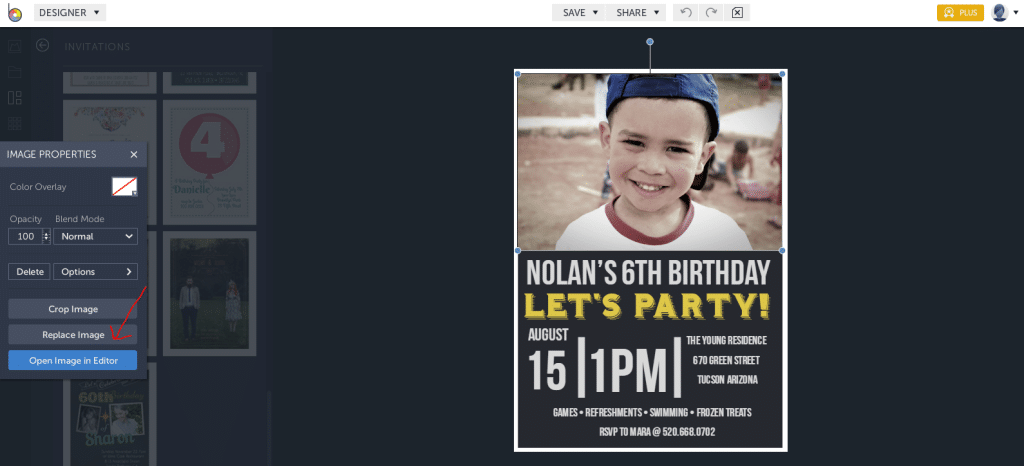
3. Click on the picture of the little boy, and an Image Properties window will pop where you should click “Replace Image.” Select the image you just edited, and it will now appear in the image window.
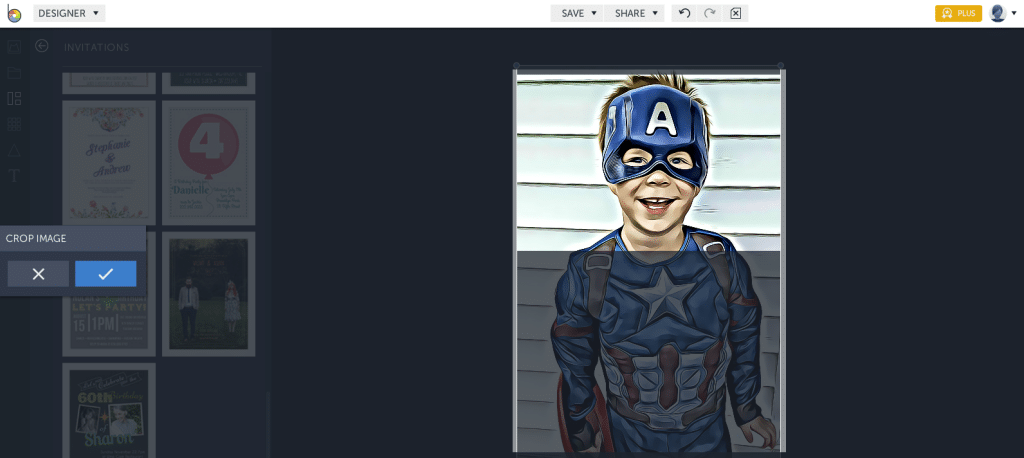
4. Click the image again, and then click “Crop Image” to reposition the image how you’d like.
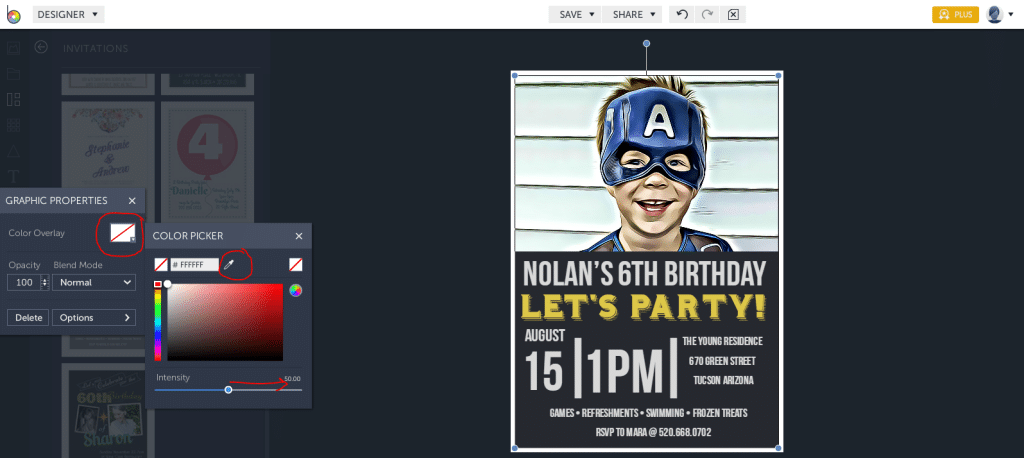
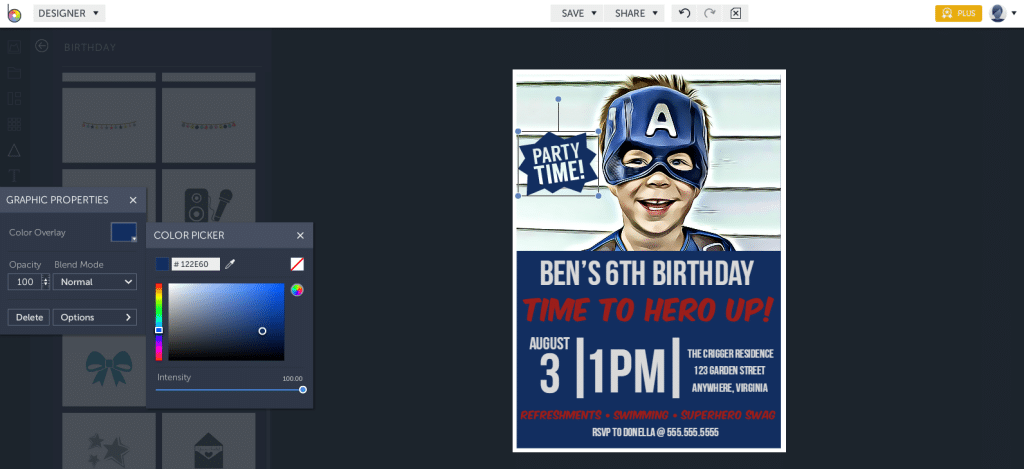
5. To change the color of the background on the text portion, click on the dark gray box, and “Graphic Properties” will pop up. Click the rectangle by “Color Overlay”, and then click the dropper tool to select a color that coordinates with your photo. Just place the dropper on any area of the photo that you like… I’m choosing a dark blue from my son’s mask. At the bottom of the “Color Picker” box, slide the Intensity level to 100%.
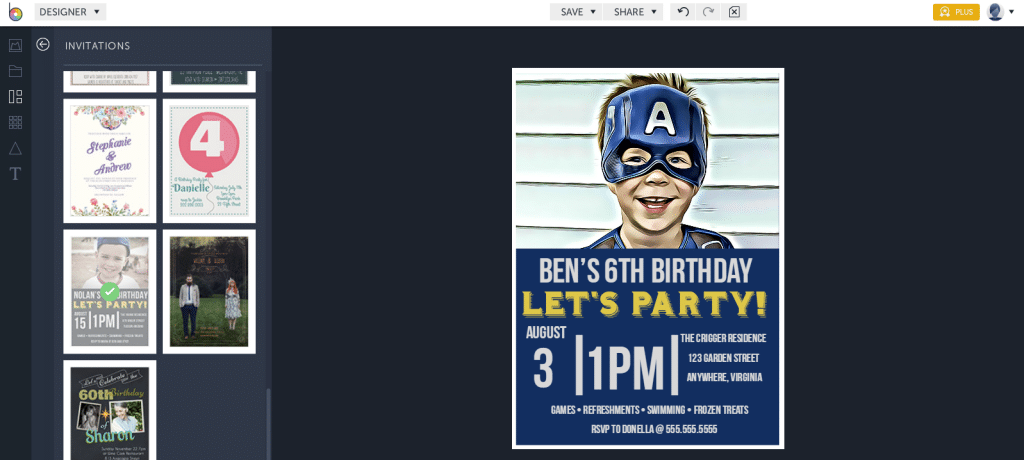
6. Now we’re ready to play with the text! To change the text, click on it (you may need to double click to highlight it), and edit with your own information.
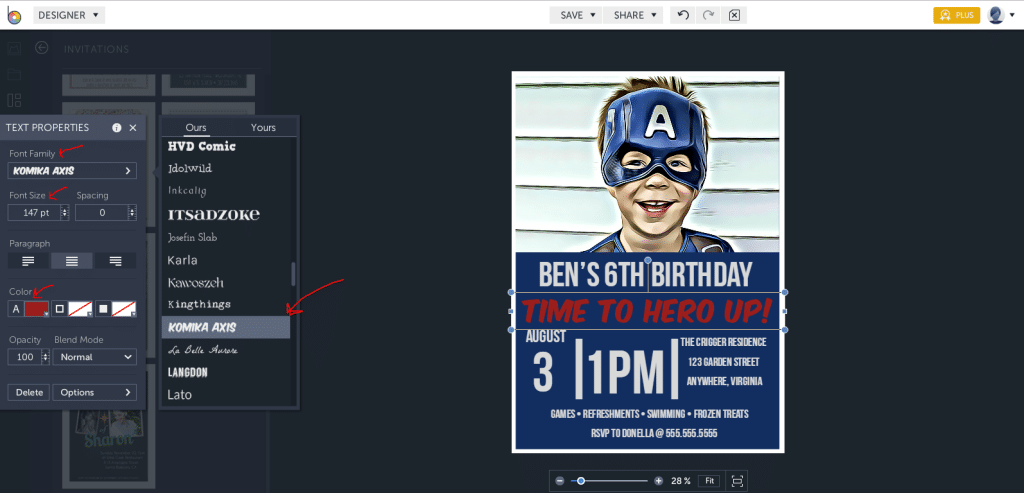
7. Looking great so far! Now let’s change the color, font and wording on “Let’s Party” as well as “Games – Refreshments – Swimming – Frozen Treats.” Let’s change the color to red and use Komika Axis – a really fun font that looks like it comes straight out of the comics! Keep in mind that when you use fonts that really stand out, you want to use them sparingly, so we’ll leave the rest of the text on the invite in Bebas Neue. The arrows in the screenshot below show you how to change the font family, font size and font color.
8. Next, we’ll add in some Design Elements by clicking on the triangle (see the arrow below).
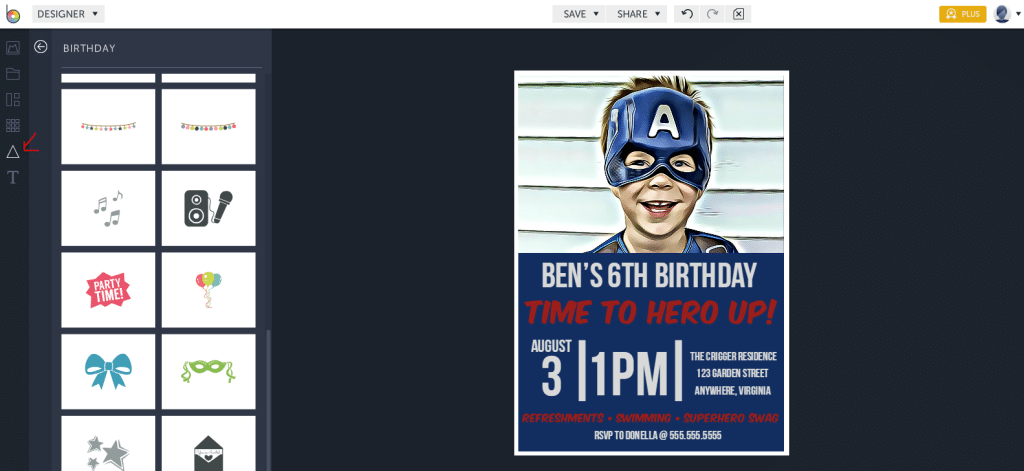
9. This “Party Time” element is so cute and fits right in with the comic theme. You can change the color by clicking on it and changing the color overlay using the color picker tool, just as we did above. Don’t forget to change the intensity to 100. I found both the “party time” and star elements in the birthday section.
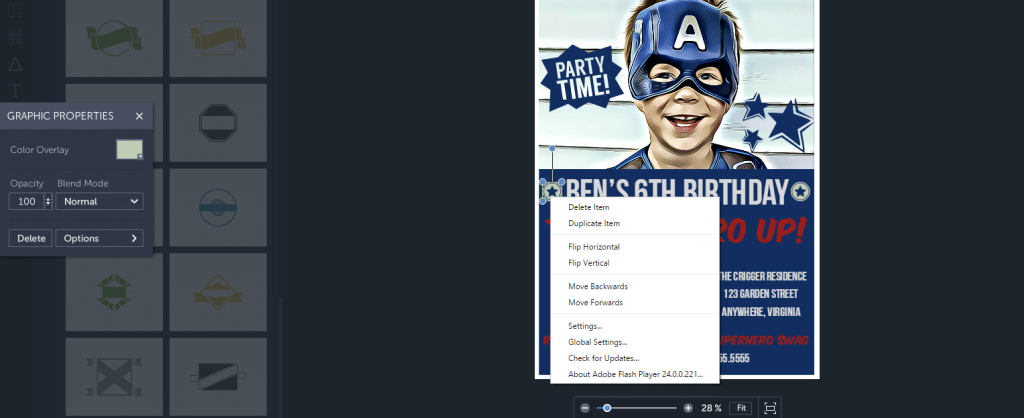
10. I found the circle and star icon in the badges section, and it reminds me of Captain America’s shield! Change the color according to the directions above, and to resize an element, just click and drag at the corners. To duplicate the item (because I put one on each side of Ben’s 6th Birthday), just right click, select “duplicate item” and that saves you the trouble of resizing and recoloring. Place it on the other side.
That’s it! Save your final design. Now your invitations are ready to print or send electronically. Isn’t it cute?

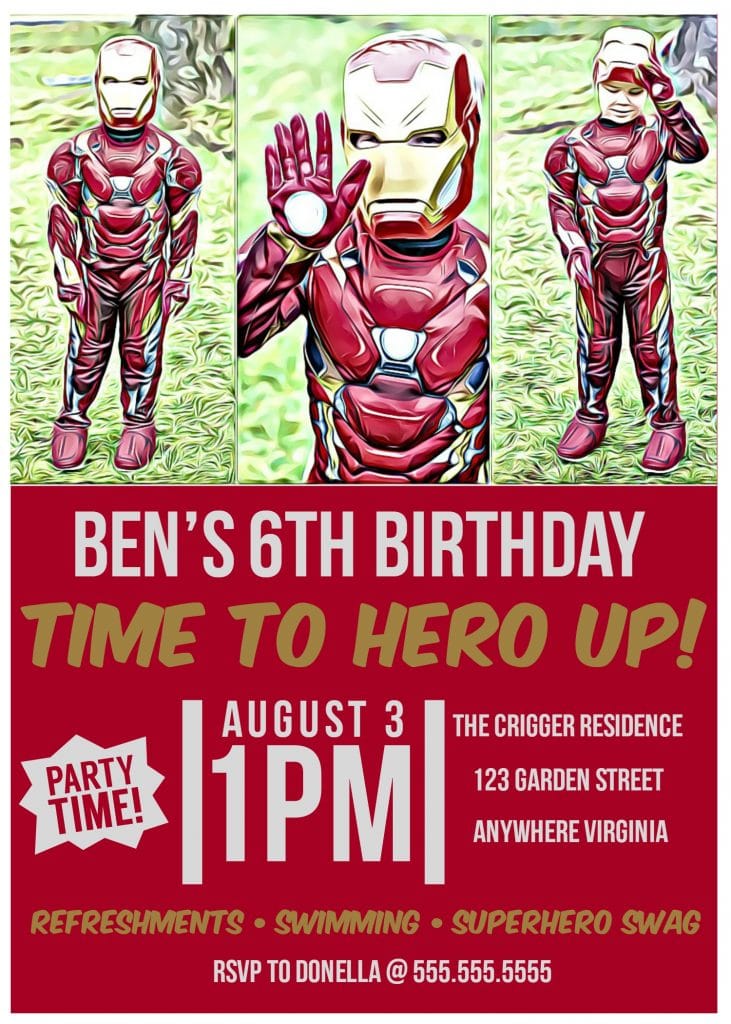
And here’s an Iron Man version I did using the same tips, except I created a collage of the three images first (using the collage tool), and then applied the effects and followed the steps you see here.
Need another run-through? Check out the screencast/video tutorial below!

Ready to make your own invitation? Try the digital art effects HERE.
