
Kettle boiled, coffee ready. But if you rush that first pour you may end up with dry coffee even with everything else correct.
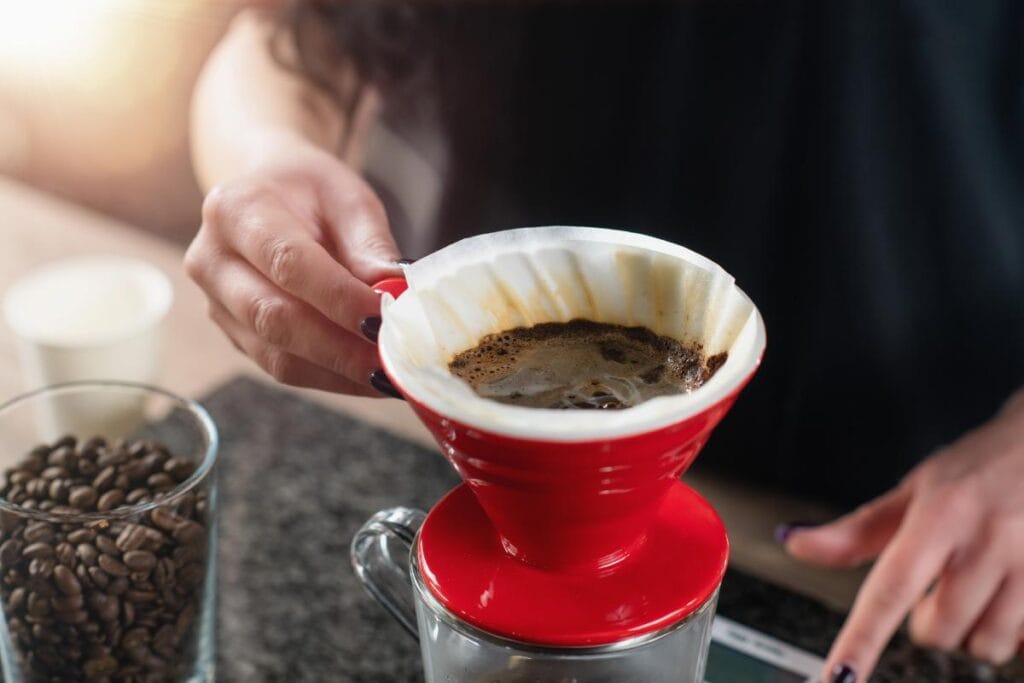
The first pour is known as blooming your coffee. There’s only so many seconds that pass while it happens, but it can be one of the most useful coffee brewing tips for anyone making coffee with a pour over.
Whether it be in the morning, night or throughout the day. Coffee at home is common among past-day U.S. coffee drinkers. According to the National Coffee Association’s latest report, they surveyed their data from June 2026 and found that 83% of U.S. adults who drank coffee the previous day, consumed coffee at home.
All you need is a timer, some consistency and know when to bloom your coffee.
What You Will Learn
- What Does Your Coffee Do When It Blooms?
- How Long Should You Bloom Coffee For?
- How To Bloom Your Coffee In 5 Easy Steps
- How To Change Your Bloom Time
- Why Your Coffee May Not Be Blooming & Solutions
- Putting It All Together
What Does Your Coffee Do When It Blooms?
If you’ve ever poured water on top of your coffee you may have noticed some bubbles popping. You may also notice your coffee looking a little puffed up similar to a cake.
This is what your coffee does when it blooms.
During the roasting process your coffee builds up gases such as carbon dioxide. These gases will escape while your coffee is stored and when it’s ground up. You can also see this happen when your water comes in contact with your coffee.
Water also penetrates into your dry coffee. This can prevent dry coffee during the brewing process.
Depending on how fresh your coffee is you may notice more or less bubbles. Coffee that was roasted more recently can create more foam, where older coffee may not show any bubbles at all. If your coffee doesn’t create any bubbles, your coffee may still taste great!
If you love trying different types of roasts, a coffee subscription allows you to try a new type of coffee each month. Make sure you’re making each coffee the same way before altering your bloom time.
How Long Should You Bloom Coffee For?
Begin with a 30 to 45 second bloom, counting from the first contact between water and grounds. Adjust the timing based on how evenly the bed wets and how the coffee tastes.
The Specialty Coffee Association’s two-cup pour-over guide uses a 30-second bloom and calls for soaking all the grounds before the main pour.
Wait until the most active bubbling slows. If dry grounds remain, spread the water more evenly instead of simply increasing the pause.
It doesn’t have to be until all of the bubbles disappear.
Different beans release gas at different rates. Use taste to decide whether changing the pause helps.
Something to keep in mind is that your bloom time should factor into your overall brew time.
How To Bloom Your Coffee In 5 Easy Steps
Make sure to have a scale available to measure your water.
Follow these steps to help you learn how to properly bloom your coffee:
- Place Filter In Dripper: Rinse your paper filter with hot water and throw the water out. Place your coffee in your dripper and give it a light shake to ensure an even bed of coffee.
- Start Your Timer: Add approximately 40 grams of water to your coffee. Make sure you cover all of your coffee, but don’t pour too much water into your dripper.
- Ensure No Dry Spots: If there are dry spots, give your coffee a light swirl to distribute water to all areas of coffee. Do not stir your coffee too aggressively as this can cause turbulence.
- Wait 30 Seconds: Allow your coffee to continue blooming for about 30 seconds.
- Continue Brewing: Finish adding your water and make sure your stream is consistent.
When blooming your coffee, you want to use 2x – 3x the amount of dry coffee you are using.
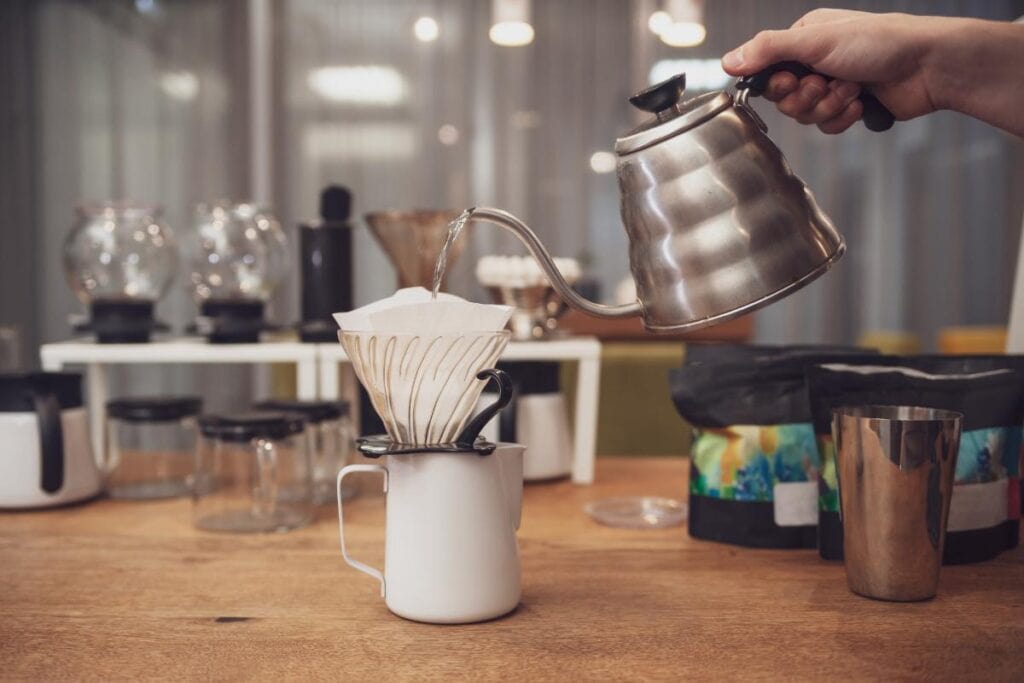
With a 20g coffee dose, use about 40 to 60g of water for the bloom. Water around 93°C/200°F is a useful starting point. Start with the middle of your coffee and work your way outwards in circles. Make sure you aren’t pouring water directly on your filter, you don’t want your water passing through without hitting coffee.
Keep these movements consistent when testing out how to properly bloom your coffee.
Adjust one variable at a time to determine what works best for your coffee.
How To Change Your Bloom Time
Keep the recipe fixed while adjusting only the bloom time. Record how evenly the bed wets and how the finished cup tastes so you can compare results.
Fresh Coffee: If your coffee is freshly roasted, you may notice more bubbles popping out of your coffee. If your coffee is still not blooming evenly, focus on distributing your water better. Once your coffee is evenly soaked, try increasing your bloom time and see how it tastes compared to your normal brew.
Older Coffee: You may not need to bloom your coffee for as long if it isn’t as fresh. Keep this in mind when reading other recipes that state a certain amount of time to bloom for.
Roast Type: As you know, coffee can be roasted in various ways. There can be more or less bubbles produced depending on your roast, but don’t base your time on just this information. Keep your amount of coffee and pour the same, then see how your coffee tastes.
More Coffee: If you’re brewing a larger batch of coffee, you may want to increase your water to make sure all of your coffee is blooming.
If coffee tastes sour, check grind size and total brew time before blaming the bloom. If the cup tastes bitter, review the rest of the brewing process before changing the pause.
Why Your Coffee May Not Be Blooming & Solutions
Not Distributing Water: If you pour all of your water in one spot, your coffee will likely create a hole in the middle and leave some dry coffee on the sides. Make sure you distribute your water over your coffee when doing your first pour.
Not Enough Water: Some people pour a small amount of water, which makes their coffee look wet on the surface, but isn’t actually soaking all of their coffee. Use your scale to measure your water and make sure you have enough to soak all of your coffee.
Pouring Water Too Aggressively: Your water should be poured at a steady pace, don’t blast your water onto your coffee. Stay close enough to your coffee that you can maintain a consistent stream of water.
Stirring Too Much: If there are some stubborn spots that aren’t getting wet, you can lightly swirl your coffee. Stirring too much can clog your filter and slow your brewing time.
Your Coffee Isn’t Fresh Enough: If your coffee isn’t creating any bubbles, it could be due to many factors. As stated earlier, how your coffee is roasted, how long it has been sitting out, etc. Don’t rely on how much your coffee blooms, but how it tastes.
Not Watching Your Coffee: Don’t just count to 30, make sure your coffee is actually blooming!
Try brewing two cups of coffee, keeping everything the same, except your bloom time.
Putting It All Together
Wet the grounds evenly, then pause for about 30 to 45 seconds. Adjust by taste, not by the size of the bubbles.
Once you figure out how to properly bloom your coffee, you’ll be able to troubleshoot the rest of your coffee process easier.