This post about organizing your homeschool resources is sponsored by Cricut. All opinions are my own. #cricutmade
Homeschoolers tend to collect a lot of materials and resources, and things can get a little messy and disorganized. The Cricut Joy is a fantastic resource for homeschool families to help you create gorgeous organizing bins and tools to keep things tidy. We used our Cricut Joy to turn plain magazine files and a 12-drawer storage shelf into a mobile homeschooling cart we can pull into any room of the house while we homeschool. Check it out!

I don’t know about you, but keeping up with our school supplies, craft supplies, and resources has been quite challenging. We are in our third year of homeschooling now, and despite all that time, our family had never worked out a great system for keeping everything organized. I had three drawers crammed full of paints, glue, googly eyes, bags, paper, manipulatives, crayons, markers, pencils, stickers, and all the other things homeschooling families tend to collect. Talk about chaos!
I’ll admit, I was a little intimated about using a cutting machine. But I’m a total beginner, and I’m delighted to say that using the Cricut Joy was an absolute breeze. If you’re a newbie like me, my best advice is to watch a few tutorials and dive right in. You’ll be making beautiful labels, stickers, and more to organize your homeschool. Cricut wants homeschool parents to focus less on preparation and more on inspiration—you can do that when you’re more organized!
Let’s get to the homeschool cart.
Materials Used for this Homeschool Cart
Below are all the Cricut materials used in making the labels for the magazine files and storage cart. Affiliate links are included for your convenience.

- Cricut Joy™
- Cricut Design Space™
- Starter Tool Set (weeding tool and scraper)
- Cricut Joy™ Smart Paper™ Sticker Cardstock, Pastels (mint color)
- Cricut Joy™ Smart Vinyl™ – Removable (mint color)
- Ultimate Fine Point Pen Set (black pen)
- Cricut Joy™ Transfer Tape
Magazine File Labels
First, I used the sticker cardstock in mint to create the magazine file labels. I wanted them to look simple since simplicity is essential when you want kids to put their things away. I went with a picture and simple font drawn on using the pins and cut into 2.75 in. by 2 in. rectangles utilizing the cutting tool.
Here are the magazine files and drawers before the labels.

I created the rectangular labels in Design Space using the font Barn Acre. You can customize the labels I made by opening up the file in Design Space, detaching the labels, and then ungrouping each label to change the elements. You can change the font, the picture, the size… whatever you’d like!

Once the labels were ready for creation, I loaded the black pen (0.4mm) into the Joy to begin drawing. Since I used Smart Paper, I didn’t have to use a mat!

The drawing went faster than I expected. It only took a few minutes to draw the images for five labels.

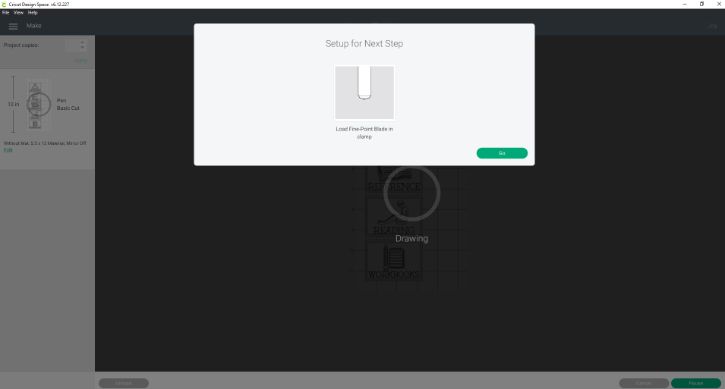
I love how it shows you step by step when to switch out between the different tools.
I placed the cutting tool in the machine to cut the labels around the design.
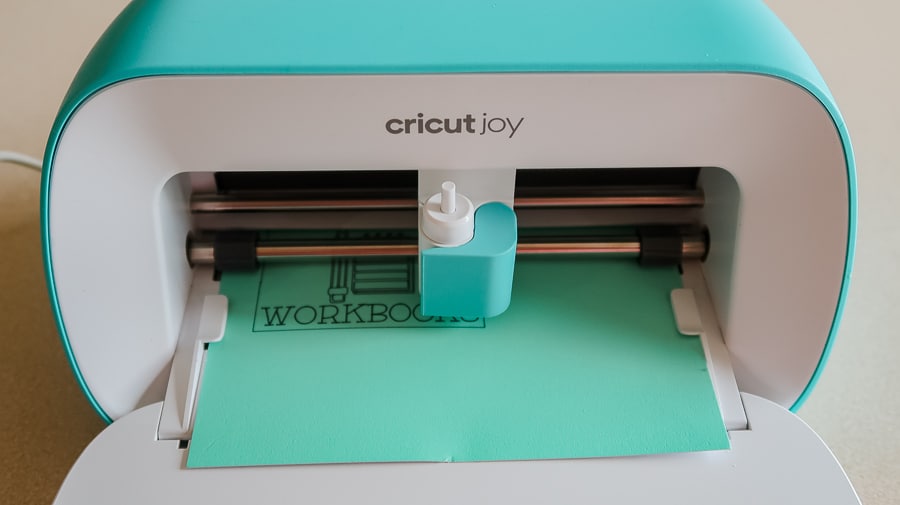
Here are the labels, all finished and ready to go on the magazine files!

And here are the magazine files with the labels applied. The workbook file is self-explanatory; the reading file contains books that we are currently working through during read-aloud time every day; the reference file holds a dictionary, thesaurus, and some nature anatomy books that we reference for science; the notebooks file contains empty and partially filled notebooks that we work in; the paper file holds our printer paper and cardstock; the catechism file holds our faith formation materials.

Labeled Storage Cart
Now we’ll go through the process of labeling the storage cart! This was my favorite part of the project. Cricut believes that creativity sparks learning, and I couldn’t agree more. We’re certainly in learning mode with our newly organized (and beautiful) materials.
I had about four inches of space on each side of the knob on every drawer, so I decided to place a word on one side and an image on the other.
Cutting the vinyl follows the same process as above but without the drawing steps. Here’s our link for this project in Design Space. I loved printing all the drawer labels on a single piece of 48″ Removable Smart Vinyl. Once the Cricut Joy cut the vinyl, it was time for weeding all of the elements. That glue bottle was a little tricky! The rest was a breeze, though.

I used the transfer tape to make transferring the letters and images to the drawers easier while keeping them intact and straight. (Or as straight as a beginner can get it, anyway.)

Here’s one of the color drawers completed! We have two of these drawers to hold all our colored pencils, crayons, and markers.

And here’s what the glue drawer looks like! We put our washi tape, clear tape, and any other sticky adhesives in this drawer.

And here are a couple of views of the finished cart!

The color and glue drawers have already been explained, but I’ll go through the rest if you’re curious. The wood drawer contains our wooden manipulatives, like popsicle sticks and wooden letters. The cut drawer includes scissors and hole punches—things we cut with. Every homeschool family needs a sticker drawer, so there’s that. The two math drawers contain our math manipulatives like base ten blocks, fraction circles, dot markers, calculators, and so on. The two Cricut drawers hold our Cricut Joy and power supply cords as well as all my Cricut materials like vinyl, paper, and tools. The craft drawer holds some string, clay, paper bags, googly eyes, pom-poms, pipe cleaners, and other crafting goodies. And finally, our paint drawer holds our acrylic paints, watercolors, and paintbrushes.
The best part of these labels? I can take them off as our homeschool needs change. Thanks to using removable vinyl, when my kid outgrows stickers and googly eyes and math manipulatives, I can peel those labels right off and repurpose the drawers for something else.
That’s the tour of our entire homeschool cart. We hope you enjoyed it.
Make your homeschool a little more beautiful with Cricut! If you don’t have a Cricut Joy yet, I highly recommend it! It’s a small machine that easily fits in a drawer but can print labels, stickers, small iron-ons, and all the other things you need to help your homeschool run smoothly.
