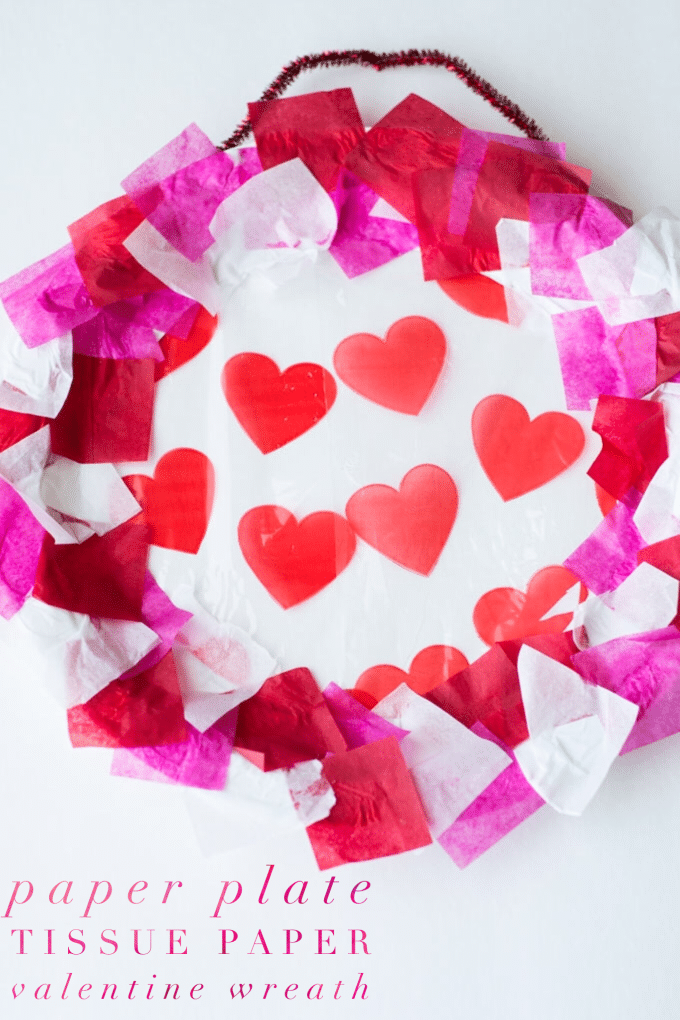
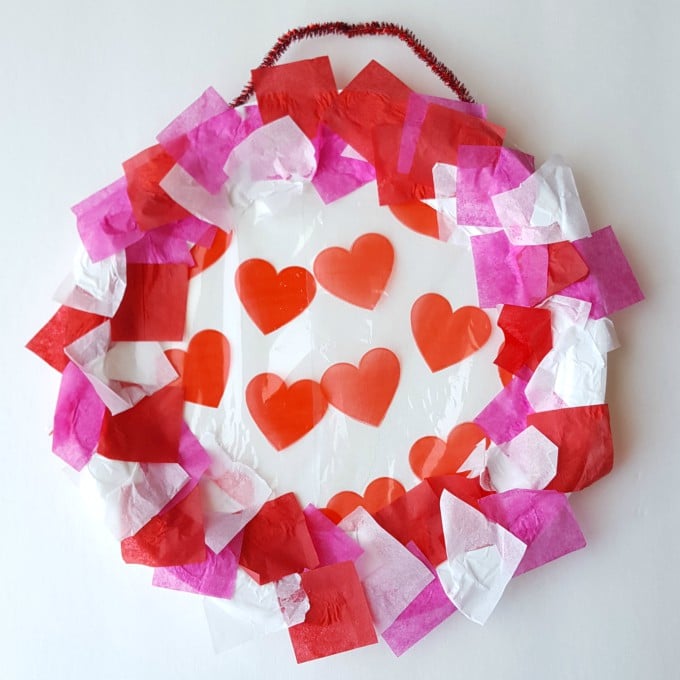
This tissue paper and paper plate Valentine wreath is a fun activity for toddlers and preschoolers. Gluing and grasping/placing the tissue paper is excellent fine motor practice. And when you’re done, you have a pretty little Valentine’s Day craft to hang on your door or mantle.
A few days ago, I shopped for a gift for one of the kiddo’s classmates, and of course, we had to make our way to the gift wrap and gift bag aisle. Even though I buy tissue paper all the time, I never seem to have any on hand. Weird, isn’t it?
But near that section were some craft materials, and it’s there that I found these little squares of tissue paper. I know, I know… you’ve probably seen them many times. But we live in a small town with limited craft supply stores, so I hadn’t seen them before. Of course, I snatched up a pack for this very idea: a paper plate Valentine wreath.
It’s a lot cuter in person, and it hangs above the entertainment center at the moment. I’d love to put it on one of the doors instead, but it’s so lightweight that it wouldn’t withstand our constant traffic. So it goes.
This is super easy to put together, and it offers little ones lots of fine motor practice with squeezing the glue and placing the tissue paper squares. You can also use glue sticks for this craft… I bet that would be a lot less messy!
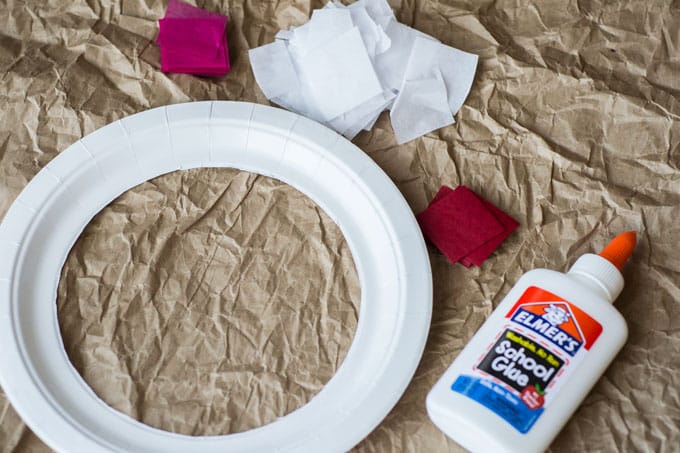
Materials for the Paper Plate Valentine Wreath:
- Tissue paper squares in red, pink and white
- Paper plate with the center cut out
- School glue or glue sticks
- Cellophane paper with hearts (optional)
- Red, pink or white pipe cleaner
Instructions:
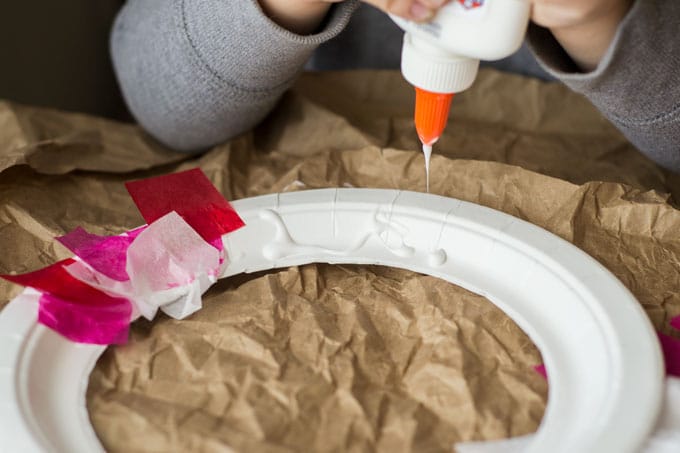
1. Cut the center out of a round paper plate. Squirt glue on the wreath a section at a time. Don’t let your little one go too crazy with the stuff, or else it’ll be on their clothes, the tissue paper and the working surface. (Yes, I learned this from experience.)
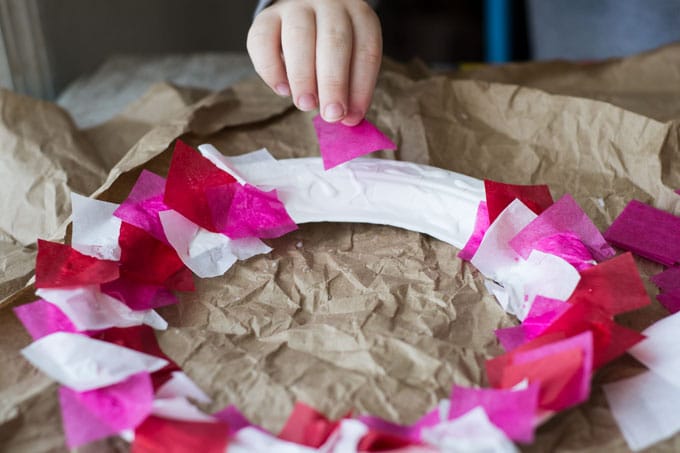
2. Apply the tissue paper squares in layers, alternating colors. This was a tough concept for the kiddo to get because he wanted to throw them on like confetti, but practicing patterns is educational!
3. Let the wreath dry for about one hour. Attach a pipe cleaner to the back to hang it up. Optional: Cut open a cellophane treat bag with hearts (we found ours at Dollar Store) to cover the center of the wreath. Glue it to the back. This is optional because I honestly think the wreath looked better without it, but the kiddo liked it with the hearts. It’s up to you!
And you’re done! Cute, right?
For more Valentine’s Day fun, check out:
Vashay Williams
Saturday 1st of February 2020
I have a question how might I present this activity to a class of toddlers.
Donella Crigger
Sunday 2nd of February 2020
If you're doing this with toddlers, I'd skip the cellophane middle and just use pre-cut tissue paper squares, glue sticks, and paper plates with the middles cut out by adults before you begin. :)